Remove the background when you need the person on a transparent layer for another layout. Blur the background when you want to keep the setting but make it less distracting. The right choice depends on what you intend to do with the finished image.
Both Camera Refine tools work best on a clear, single-person portrait. They are not general product or pet background tools. The comparison below uses the same AI-created portrait and our actual processing, so you can inspect what each operation changes.
See the two results side by side
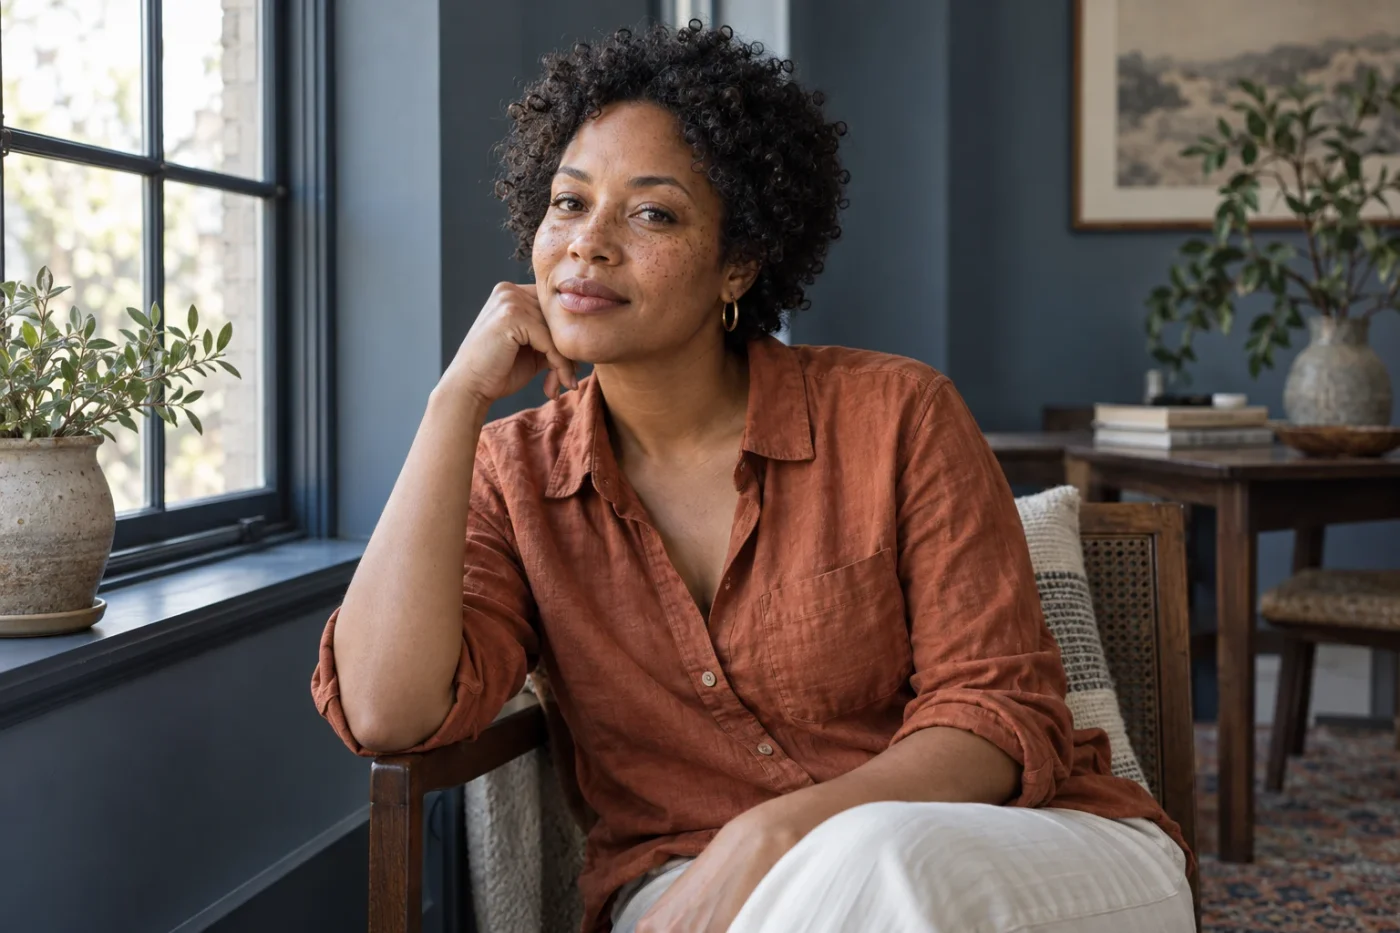
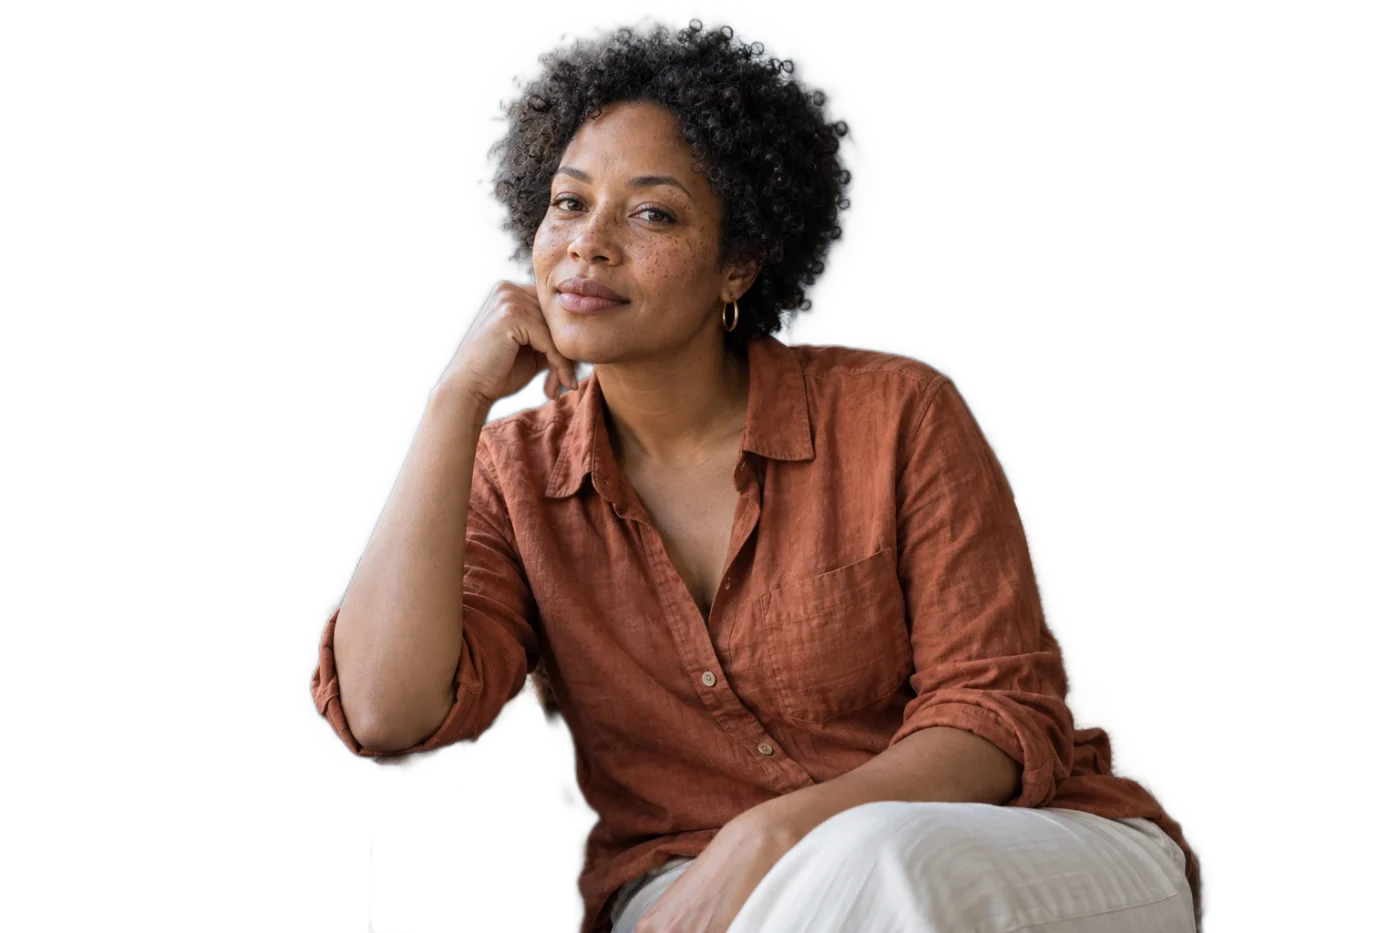
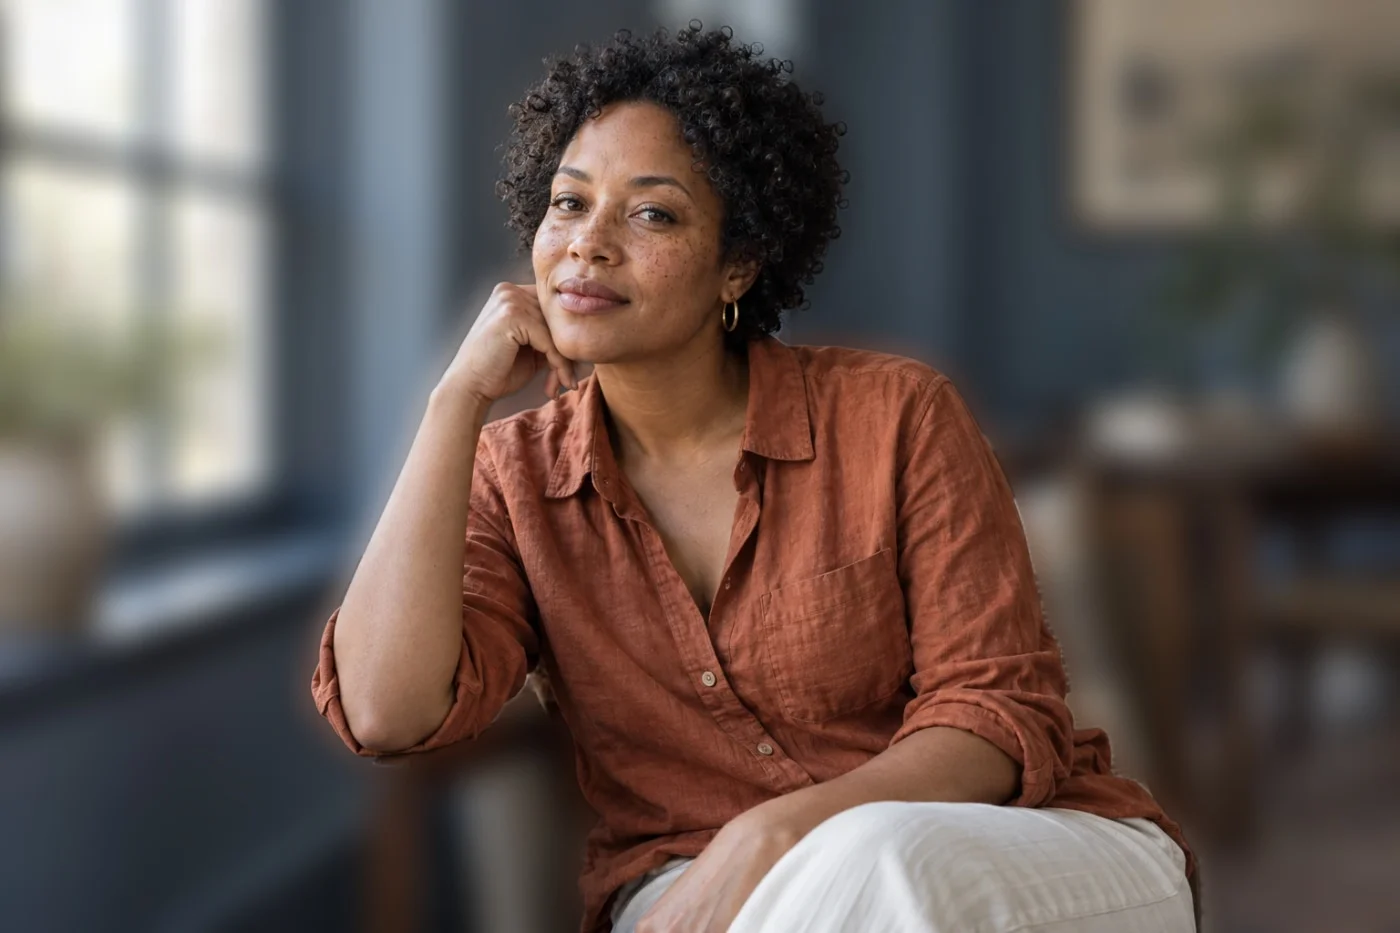
The same AI-created portrait, processed separately by each tool. Checkerboard indicates transparency.
With removal, the room is gone and the result has transparency. The checkerboard shows where the image is transparent; it is not part of the downloaded PNG. With blur, the room remains recognizable as a setting, while its detail becomes softer. The standalone blur tool leaves the subject’s original color treatment in place.
| Your goal | Starting tool | Download |
|---|---|---|
| Place the person in a design or on another backdrop | Remove background | Transparent PNG |
| Keep the room or location with less distraction | Blur background | JPEG |
| Get a finished ivory or charcoal backdrop | Studio backgrounds | JPEG with a fixed backdrop and tonal treatment |
The studio looks are a separate operation. They do not generate arbitrary locations, change clothes or create a new pose.
Remove a portrait background
- Open Portrait background remover and choose Upload a portrait.
- Select a JPG, PNG or WebP under 20 MB and 40 megapixels. Convert HEIC or RAW first.
- Wait for the transparent preview, then inspect the person’s outline. Use Zoom 100% for hair, shoulders and clothing edges.
- Choose your output size and save the PNG. Keep this PNG when you need transparency in another app.
Avoid converting the result to JPEG if you need its transparent background. The editor’s social-size outputs are also JPEG, so use the original cutout download for a transparent layer.
Try the cutout on your photo. If you already have a photo in this browser, this opens the effect on that original; it does not cut out a previously edited export.
Blur a portrait background
Open Blur background and upload a portrait, or continue with your unexpired photo. Compare the result with Show original. Look at the face first, then the outline and objects immediately behind it.
The current effect automatically softens the existing background. It does not move the point of focus, repair an out-of-focus face, change focal length or recreate a particular lens. There is no manual brush or blur-strength slider in this standalone tool.
Try background blur. Use it when the setting belongs in the photo but the detail competes with the person. If you want a different color treatment and a softer background together, the separate Soft Focus portrait look is another option in the library.
Look closely at hair and edges
Hair is a useful stress test. Check loose curls against a bright window, gaps between strands, a shoulder against a similar-colored wall, and any transparent material. Small mistakes are easier to miss in a fit-to-screen preview.
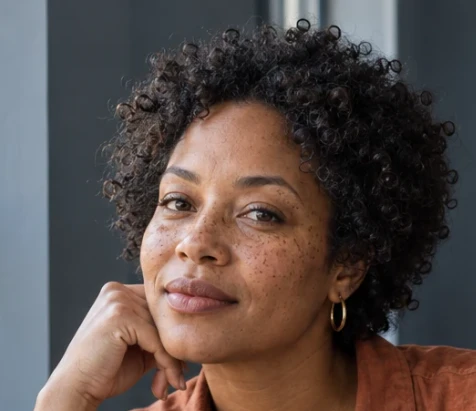
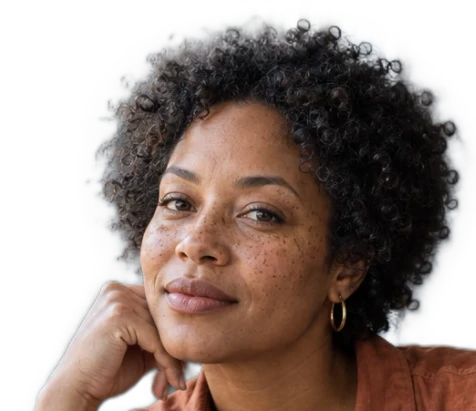
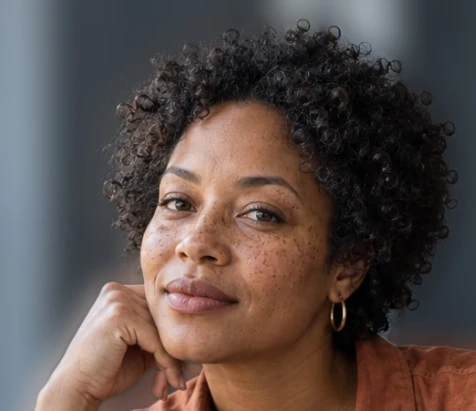
The crops above enlarge the same area of the same source and outputs. A convincing full image does not guarantee a perfect edge. The current tools provide automatic separation, without a manual refine-edge brush. If a halo, missing strand or piece of background remains, try a clearer source image or finish the mask in an editor with manual controls.
Can you combine these with a filter?
Switching between tools starts again from the original photo and replaces the current effect. Background removal followed by a color filter does not create a stacked cutout-plus-filter result in this version.
Choose the result you need before exporting. For color-only editing, use Photo filters. For the two ready-made backgrounds, use Studio backgrounds. This keeps the output predictable without asking you to manage layers.
Free saves, HD and photo privacy
Your upload is processed on our server and expires within 24 hours. Photos are not used for training or public examples, and you can delete an uploaded photo and its edits from Photo tools. Download the result before expiry. Read privacy and format details if you are preparing a photo for another workflow.
For a group of color edits, batch photo filters explains representative previews, save allowances and ZIP downloads. Start with one successful portrait before considering a whole set.
See it on your own photo.
A starting point, not a fixed choice. Every other available look stays within reach.
Try background blur ↗